How does nail polish affect your nails?
Nail polish can both help and harm your nails. It protects them from damage but can also weaken them over time, especially if removed improperly. The ingredients, application method, and maintenance matter. Using good-quality polish, proper technique, nail oil, remover, and giving nails an occasional break can mitigate negative effects.
Nail polish has become a staple of beauty and self-care routines for people around the world. From glitzy glam to low-key neutrals, a swipe of color or shine can instantly elevate your look.
But what effect does nail polish have on your nails’ health? Can frequently painting your nails cause damage? Or does the lacquer layer offer protective benefits?
As with many beauty treatments, the true impact depends on multiple factors. The ingredients present, application methods utilized, maintenance between polishes, and removal techniques can all sway the results toward harm or healing.
Understanding the pros and cons of nail lacquer, best practices, and your unique nail physiology will help you make choices that care for your claws.
How Nail Polish Interacts With Nails
Contents
- How Nail Polish Interacts With Nails
- Does nail polish protect or damage nails?
- Application Methods That Prevent Nail Damage
- Between-Polish Nail Care
- Safe and Effective Nail Polish Removal
- Signs Your Nail Polish Use Is Unhealthy
- Create Your Custom Nail Polish Plan
- FAQs
- Does nail polish damage natural nails?
- How long should you keep nail polish on?
- What helps nail polish dry faster?
- How long should you leave gel polish on?
- Can you use clear nail polish as a base coat?
- How do you apply nails step-by-step?
- Can I paint my nails every day?
- How often should you change your nail polish?
- Why does my nail polish bubble?
- How do you fix a nail you broke while polishing?
- What helps nails recover from acrylics?
- Why are my nails peeling after removing acrylics/gel/dip powder?
- How to hydrate nails after removing gel polish?
- How to fix damaged nails from gel polish?
- Conclusion
To understand if and how nail polish affects the nails, you first need to know a bit about the structure and composition of each.
Nail Anatomy
Human nails consist of:
- The nail plate is the visible, hard portion made of translucent keratin protein. This dead cell structure grows from the nail matrix underneath the cuticle.
- The nail bed: soft tissue underneath containing nerves and blood vessels.
- The cuticle is a thin skin layer rimming the base and sides of the nail, acting as a protective barrier.
- The eponychium’s skin overlaps the top of the nail plate, forming a seal.
- The hyponychium is the skin beneath the free edge of the nail.
- The nail matrix is the area under the cuticle containing cells that become the nail plate.
Nail Polish Composition
Nail lacquers contain:
- Pigments provide color.
- Resins: Allow flexibility for adhesion and a glossy finish.
- Solvents carry solid particles and control thickness. They evaporate as the polish dries.
- Additives: Enhance durability, drying time, shine, and other properties.
Now that we know what makes up both nails and polish, we can analyze how they work together.
Does nail polish protect or damage nails?
Slicking color across your nails seems like it would simply coat the surface without significantly impacting structure or health. But that is not entirely accurate. The effects vary based on numerous factors.
How Nail Polish Protects Nails
Applying an additional layer creates a protective shield that prevents nails from:
- Breaking or cracking
- Splitting
- Becoming brittle
- Peeling
- Chipping
- Thinning
The additional protection that polish offers preserves strength and prevents foreign substances like water, detergents, dirt, and bacteria from penetrating delicate nail tissue.
Thicker or treatment polishes go even further to nourish nails with:
- Vitamins
- Oils
- Moisturizing agents
- Fortifying proteins
- Herbal extracts
These replenishing ingredients improve growth and regeneration for better-looking nails over time.
How Nail Polish Can Damage Nails
It seems counterintuitive that a product designed to beautify nails could simultaneously ruin them. But while lacquer has upsides, it also carries notable risks, which intensify with improper use.
Ingredient Dangers
Many older or cheaper polishes still rely on hazardous ingredients like:
- Formaldehyde: a Carcinogen that helps harden polish
- Phthalates: plasticizers for flexibility linked to endocrine disruption
- Triphenyl phosphate- is a fire retardant and plasticizer that may disrupt hormones and fertility
- Toluene is a harmful solvent that causes respiratory damage
- Xylene is a Flammable ingredient associated with organ damage
- Camphor is an Essential oil that can irritate skin and be toxic if ingested
Newer, non-toxic formulations swap out these chemicals for safer ones like acetates, malic acid, and butyl acetate made from plants. Always check the ingredients before purchasing polish.
Repeated Exposure
Leaving color on nails for long periods means extended contact with both the helpful and harmful components listed above. This recurring exposure can lead to:
- Weak, thin, peeling nails
- Brittleness
- Dryness
- Discoloration or yellowing
- Infection if seal is not complete
Difficult Removal
Taking off old polish often requires strong solvents that strip nails. Harsh acetones break down connections between cells, causing:
- Weakness
- Flaking
- Cracking
- Splitting
Soaking in remover for extended periods worsens the damage. Rushing the process can leave residue stuck to nails.
Misuse
Even top-notch polishes can suffer harm if improperly applied by:
- Flooding cuticles instead of nail plate
- Touching surrounding skin that absorbs chemicals
- Failing to let layers dry adequately between coats
- Not using basecoat for protection
In the worst cases, misusing polish or remover can burn skin or stain nails permanently if cells become overloaded with pigment.
Now that you know both the benefits and drawbacks nail lacquer can have on your nails, let’s explore best practices to maximize rewards while minimizing risk.
Application Methods That Prevent Nail Damage
You can counteract nail polish’s potential downsides through conscientious choices in products and processes. Follow these application techniques:
Choose 8-Free or 10-Free Formulas
Seeking out polishes labeled “X-free” means they are formulated without several common harsh chemicals. The most nail-friendly options exclude 8–10 key culprit ingredients.
Use a Nourishing Base Coat
Begin with a base layer containing caring ingredients like keratin, bamboo extract, argan oil, and vitamins. This gives a smooth foundation to help prevent staining or damage from color.
Apply Thin Coats
Thicker polish won’t adhere as evenly, leading to chips and peeling. Do 2-3 thin coats for a protective layer without flooding the nails. Make sure the polish is dry between applications.
Cap-Free Edge
Run a brush along the tips of the nails with each coat to seal thoroughly. Uncovered edges peel and crack faster.
Avoid Cuticles and Skin
Keep the brush centered on the nail plate when swiping on color. Prevent polish from touching soft cuticles or skin, which can cause redness and irritation.
Use Quick-Dry Top Coat
Finish off the manicure by sealing the color with a glossy top coat to help the polish set evenly and quickly. This locks in longevity and shine.
Following these tried-and-true nail painting pointers will help you achieve picture-perfect polished nails that do not pay the price in damage.
Between-Polish Nail Care
The period in between paint jobs offers the perfect chance to give your nails some reparative TLC. Follow these between-manicure maintenance steps:
Take Occasional Polish Breaks
Allow nails to breathe product-free for a few days every 2–4 weeks. This gives them a chance to rebuild their strength without interference from lacquers.
Moisturize With Nail Oil
Massaging oils like jojoba, vitamin E, avocado, or argan into nails and cuticles counteracts the drying effects of polish. The hydration helps increase resistance against breakage or infection.
Use a Gentle Nail File
Lightly buff away shine to remove surface residue instead of stripping the polish entirely. Smooth uneven edges, but avoid over-filing nails.
Get Adequate Nutrition and Hydration
Supporting nail health from inside your body provides the keratin-forming building blocks. Get enough biotin, zinc, iron, and vitamins in your diet. Stay hydrated to keep your nails flexible.
With some attentive upkeep, you can maintain gorgeously polished nails between manicures.
Safe and Effective Nail Polish Removal
Taking off old lacquer may seem straightforward. However, improper technique can lead to short-term pain and long-term problems. Avoid these mistakes:
Do not Pick Off Polish
Peeling the color off leaves nails thin, ragged, and vulnerable to splitting or breaking.
Do not use Hard Tools
Scraping tools cause surface and side damage, inviting infection.
Do not Rip Off Gels
Improper gel removal rips layers of nail cells away, leading to thinning and fragility.
Instead, rely on removers formulated to gently dissolve polish.
Use Acetone-Free Options
When possible, choose plant-based, acetate-, or soy-based formulas over harsh acetones, which dry out nails.
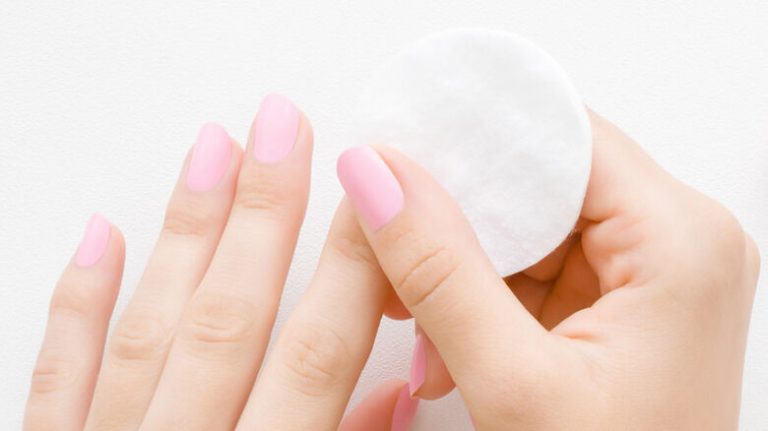
Soak Cotton Pads Rather Than Nails
Place pads soaked in remover directly on top of the polish. This prevents liquid from flooding cuticles or nail undersides.
Take time to let the solution work.
Wait several minutes for it to break the bond with polish fully.
Gently Wipe Away
Once the polish appears loosened, gently slide a cotton pad across the nail to catch and absorb the dissolving color. Repeat with fresh pads until entirely removed. Avoid rubbing roughly.
Rinse and Moisturize
Finish by washing nails clean of any leftover residue, then massage in nourishing cuticle oil to counteract drying effects.
Making removal a calm, patient process prevents you from sacrificing your beautiful nails just to swap out colors.
Signs Your Nail Polish Use Is Unhealthy
While an occasional chipped tip or dried cuticle comes with manicure territory, some red flags signal your polish practices need addressing:
- Splitting, peeling, or cracking nails
- Thin, weak or brittle nails
- Discolored, yellowed, or stained nails
- Inflamed, irritated, or painful skin around nails
- Frequent nail infections
- Strong reaction or rash after polish use
If you notice any of the above, especially chronically, take it as a cue to switch products, techniques, or frequency until symptoms improve. Let your nails fully heal before applying polish again. Seek medical help for severe reactions.
Listen when your nails talk back! Making small tweaks to restore health prevents more intensive reconstruction down the road.
Create Your Custom Nail Polish Plan
Ultimately, maintaining beautiful nails boils down to balance. The good news? You can customize a manageable routine that keeps your nails looking fab without causing damage.
Follow these steps to find your personal nail polish plan:
Assess Nail and Skin Sensitivity
Pay attention to any irritation issues when trying new brands or ingredients. Is your skin reactive, or are your nails super fragile? This determines what formulas you can comfortably use.
Select 1-2 Polishes
Curate your collection to signature shades you will actually wear regularly so none expire before finishing. Limiting variety is both budget-friendly and earth-friendly!
Use Treatments Sparingly
Do not overdo reparative polishes. Let your nails recover between intensive interventions.
Paint Only 1-2X Weekly
Frequency depends on your nail’s toughness. Allow some product-free days for protection against overexposure.
Shorten Wear Time
If nails are weak, do not drag out manicures. Fresh polish every 3–4 days reduces chemical contact.
Remove Gently
Take time to protect your nails when taking off the polish. Soak, do not scrape!
Revaluate your routine whenever you notice problems reappearing. You may need to switch products, adjust techniques, or simply give your nails a polish break.
Staying attuned to your body’s signals and sticking to a sustainable schedule keeps your nails in tip-top condition!
FAQs
Does nail polish damage natural nails?
Nail polish can damage natural nails if used improperly or excessively. Harsh ingredients like formaldehyde, phthalates, and acetone can cause nails to become dry, brittle, and discolored with repeated exposure. Choosing 8-free and 10-free formulas can help avoid these chemicals.
Capping the tips of nails and avoiding flooding cuticles and skin also prevents the absorption of harmful ingredients. Taking occasional breaks from color allows nails to recover strength and moisture. With the right polish and practice, your natural nails can stay healthy.
How long should you keep nail polish on?
As a general rule, nail polish should not be kept on natural nails for more than 5-7 days. The longer polish remains on nails, the more moisture is sealed out, causing dryness and brittleness over time. Continual chemical exposure can also weaken nail structure. Those with a history of infections may need to replace polish after only 2–3 days to prevent lifting. Occasionally, allowing nails to be polish-free for one week allows them to rebuild strength.
What helps nail polish dry faster?
Using a fast-drying top coat is the best way to help nail polish dry quickly. Top coats contain nitrocellulose resins that harden and set the underlying lacquer rapidly through evaporation. Quick-dry formulations often include isopropyl alcohol or butyl acetate to speed up water loss.
Applying polish in thin coats also reduces drying time compared to thick, heavy layers. Blowing gently on wet nails can help hasten evaporation. Avoid extreme heat, which can bubble polish.
How long should you leave gel polish on?
Gel polish is more durable than traditional lacquers, with less potential for damage. But nails still require occasional breaks. Keep gel manicures intact for 10–14 days before soaking them off and reapplying. The full UV light curing process hardens polish, completely preventing moisture from reaching nails as easily. However, allowing periodic breathers avoids long-term dehydration and thinning.
Use nail oil between gels. Seek professional removal rather than picking.
Can you use clear nail polish as a base coat?
Clear polish can double as a base coat in a pinch to save money and streamline products. Opt for a nourishing, clear formula containing oils, aloe, vitamin E, or other moisturizing ingredients. Avoid cheap, high-shine top coats, as the quick-drying agents may counteract the base layer. Apply a single thin but complete coat, allowing it to dry before adding color.
The clear base should fill ridges and have smooth roughness for even application. Always use a proper top coat to seal the full manicure.
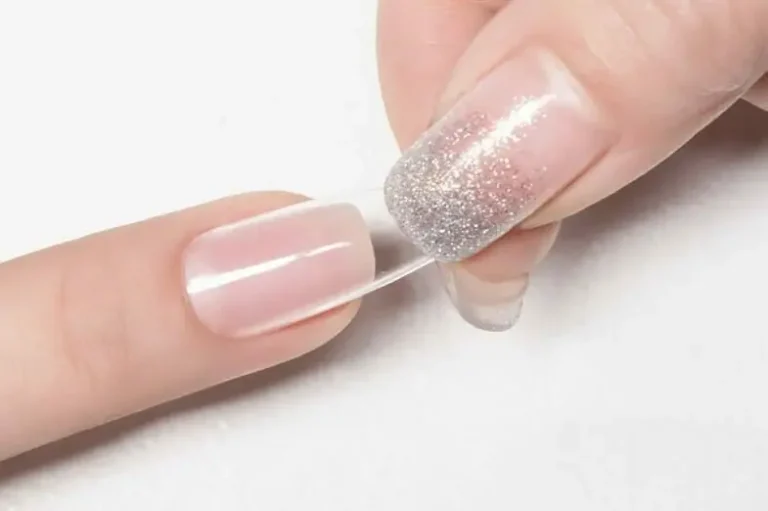
How do you apply nails step-by-step?
Follow these steps for a flawless at-home manicure application:
- Shape nails evenly with gentle file
- Soften cuticles with oil or remover
- Push back cuticles gently with a tool
- Cleanse nails to remove residue and oils
- Apply a thin base coat and let dry
- Paint on 2-3 thin color coats, allowing drying between
- Cap-free edges with color
- Apply a quick-dry glossy top coat to seal
- Finish with calming cuticle oil
Can I paint my nails every day?
Painting nails every day is not recommended. Continuous coloring will seal out moisture leading to eventual brittleness, cracking, and breakage over time. Everyday use also leads to recurring exposure to potentially harmful ingredients like solvents, resins, and pigments before they fully off-gas.
Aim to leave nails polish-free for at least 1-2 days per week, using nourishing oils on the bare nails and cuticles instead. Those with nail conditions like psoriasis may need longer uncovered stretches.
How often should you change your nail polish?
On average, nail polish should be changed every 4-5 days on natural nails to prevent chipping and growth of bacteria. Reapplying fresh lacquer replaces loose or broken sections prone to lifting and catching dirt. The regularity also limits the duration of ingredient exposure. Gels and longer-wear polishes may last up to 2 full weeks thanks to durable formulas. Always check polish for wear, and replace when chipped. See a doctor if nails show infection between changes.
Why does my nail polish bubble?
Nail polish bubbling while drying happens when layering coats too quickly. Solvents and moisture get trapped between insufficiently dried layers causing bubbles and an uneven texture. Always allow each coat to dry completely before adding the next. Cold conditions can also cause bubbling by slowing evaporation while heat speeds the drying. Use thin applications of polish and a quick-dry top coat to ensure adequate air circulation for smooth results.
How do you fix a nail you broke while polishing?
First, clean up excess polish around the crack using remover and cotton pad rather than scraper tools or picking. File any jagged edges smoothly. Apply a small adhesive bandage or nail glue to bond the tear temporarily. Add enough polish atop the crack to seal and reinforce the nail.
Avoid flexing the nail bed to prevent further cracking while the glue sets. Keep the polish intact for up to a week, allowing new growth to emerge and slowly pulling the broken edge forward. See a doctor if the pain continues.
What helps nails recover from acrylics?
To help nails recover from damage from acrylics or other enhancements follow these tips:
- Massage jojoba oil daily post-removal to hydrate and nourish
- Brush on reparative treatment polishes containing proteins or vitamins
- Apply moisturizing night creams to nails under soft cotton gloves
- Allow two weeks without polish before reapplying color.
- Take biotin supplements to help strengthen and rebuild thin areas
- Eat a nutrient-rich diet and stay hydrated for growth
- Avoid future enhancements until nails fully healed
Why are my nails peeling after removing acrylics/gel/dip powder?
Nails peeling after removing enhancements result from leftover product adhered to the natural nail plate. Soaking does not fully dissolve the enhancements for complete removal. Buffing is needed to gently expose bare nails and enable thorough cleansing.
Avoid picking peeling parts which further thins nails. Use acetone with tin foil wraps to fully dissolve enhancement then scrub with soft brush nail prep solution. Moisturize nails well and allow them to grow out peel-free before reapplying polish or enhancements.
How to hydrate nails after removing gel polish?
Proper hydration is key to restoring nail health after gel removal. Follow these methods:
- Soak nails in olive oil for 5 minutes
- Massage in vitamin E cuticle oil
- Smooth on aloe vera gel then cotton gloves overnight
- Repeat oil soaks & treatments for a week
- Always wear gloves for wet tasks like washing dishes
- Take biotin supplement to boost moisture within nail cells
- Use rich moisturizing cream as a base coat under polishes
How to fix damaged nails from gel polish?
Healing Gel-Damaged Nails
- Buff away residue
- Soak in reparative oil
- Massage in treatment creams
- Use strengthening polishes with argan oil
- Rotate moisturizing base and top coats
- Improve diet and hydration
- Take biotin supplement
- Allow months polish-free for full recovery
Conclusion
So in summary – yes nail polish affects your nails, but not inherently for the worse. With knowledge of ingredients, conscientious care in application and removal plus restorative aftercare, you can continue sporting vibrant lacquered nails without sacrifice or damage!
Founded by Sophia Rodriguez, IGXO Cosmetics is a PETA-certified, cruelty-free, and vegan makeup brand.