Almond-Shaped Nails With A French Tip: 9 Chic Looks And How To Master Them In 2026
almond shaped nails french tip offer a timeless look that suits many hand shapes. This guide explains what almond nails are and why the French tip fits them. It shows how to prepare, apply, and fix common issues. It presents nine design ideas and color combinations for a modern finish. The text uses clear steps and simple advice so readers can copy looks at home or explain them to a technician.
Key Takeaways
- Almond shaped nails french tip elongate fingers and complement various hand shapes with an elegant silhouette.
- The French tip enhances the almond shape by following its natural curve, creating balanced and polished nail art.
- Proper preparation—cleaning, filing, buffing, and applying thin polish layers—is essential for a long-lasting French tip on almond nails.
- Design variations include classic white tips, colored accents, negative space, and matte finishes, all highlighting the almond contour.
- Use precise tools such as fine-grit files, cuticle pushers, and liner brushes to achieve a neat almond shaped nails french tip look.
- Common mistakes like uneven tips or chipping can be fixed with careful filing, flexible polish, and correct layering for durable results.
What Are Almond-Shaped Nails (And Why They Flatter So Many Hands)
Almond shaped nails french tip starts with a specific nail silhouette. A nail technician files the sides narrow and rounds the tip to mimic an almond. This shape elongates fingers and balances wider knuckles. It also reduces breakage by removing sharp corners. Many clients choose almond shape because it looks elegant with moderate length. Nail length varies. Short almond keeps hands practical. Longer almond adds drama. People with narrow or wide hands find the shape flattering because the curve at the tip softens proportions.
Why The French Tip Is Perfect For Almond Nails — Proportions, Length, And Style
The French tip complements the almond silhouette by highlighting the tip curve. A classic white French tip follows the natural arc of the almond edge. This alignment creates clean proportions and a tidy visual end point. The French tip also adapts to length. Thin tips suit short almond nails and wide tips suit long almond nails. Designers vary the thickness, color, and angle to match personal style. Almond shaped nails french tip keeps the manicure focused on shape rather than complex art. The result looks polished, balanced, and wearable for many occasions.
How To Prepare And Apply A French Tip On Almond Nails
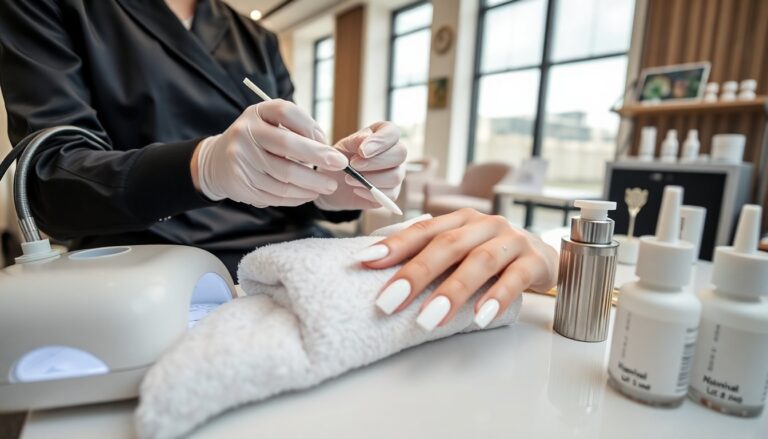
Preparation affects how well the French tip lasts. A technician or DIYer should clean the nail, push back cuticles, and file to an almond outline. Next, they should buff the surface and remove dust. A clean base helps polish adhere and prevents lifting. Use thin layers of base coat, color, and topcoat. Almond shaped nails french tip needs steady hands and correct tools. Use guides or freehand for the white line. Cure times matter for gel systems. Allow full dry time for regular polish. Proper prep and cautious application produce a neat, long-lasting French tip on almond nails.
Design Ideas, Variations, And Color Combinations For Almond French Tips
Almond shaped nails french tip works with many variations. A traditional look uses white tip and sheer pink base. A modern look uses nude or neutral base with a thin black tip. A colored tip in red, navy, or metallic creates a bold accent. Use negative space by leaving part of the smile line bare and painting the rest. Add a glitter tip for evening wear and a matte base for contrast. Try a dipped ombre tip that fades into the base color for a soft effect. Mix a thin gold stripe above the tip for subtle glam. Rotate tips diagonally for a trendy slanted French. Each variation keeps the almond contour visible and enhances finger length.
Essential Tools And Products For A Clean Almond French Tip
Almond shaped nails french tip requires a few reliable tools. A fine-grit file and a buffer shape the almond form. A nail brush removes dust. A cuticle pusher clears the base for a crisp smile line. Use guide stickers or a thin liner brush for the tip. Choose a flexible white or colored polish for the tip to prevent chipping. A clear base coat and a high-gloss topcoat seal the look. For gel manicures, include a gel base, color gel, gel white, and a UV/LED lamp. A lint-free wipe and alcohol solution remove residue after curing. These products make the French tip clean and durable.
Step-By-Step Application: From Shaping To Final Topcoat
Step 1: Clean the nails and push back cuticles. Step 2: File each nail to the almond outline with side strokes that narrow toward the tip. Step 3: Buff lightly and remove dust. Step 4: Apply a thin base coat and let it dry or cure. Step 5: Paint a sheer base color if desired and let it dry or cure. Step 6: Place guide stickers below the tip line or freehand a smile line with a liner brush. Step 7: Fill the tip with white or chosen color and let it dry or cure. Step 8: Remove guides and clean edges with a small brush dipped in remover. Step 9: Apply two thin topcoats and cure or dry fully. Step 10: Finish with cuticle oil to hydrate the skin.
Common Application Mistakes And How To Fix Them (Including Short Nails)
Mistake: Tip looks uneven. Fix: File the edge to a smooth curve and repaint the tip with a thin liner brush. Mistake: Polish pools at the sidewalls. Fix: Clean excess polish with a small brush and remover before curing. Mistake: Tip chips quickly. Fix: Use flexible tip polish and seal the free edge with topcoat. Mistake: Short almond nails make the smile line cramped. Fix: Use a thin tip or a narrow colored line to keep proportions. Mistake: Thick layers cause bubbling. Fix: Apply thinner coats and allow full dry time between layers. These fixes help maintain a neat almond shaped nails french tip look.